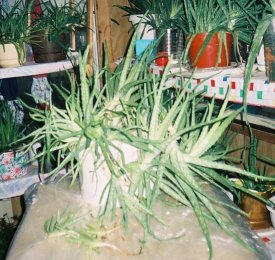
Propagation
Let's talk Propagation, or how to multiply your aloe vera plants. Here is my own simple propagation method for starting new aloe vera plants fully described, including soil preparation, whether to fertilize, and how to prop up a leaning plant.
Aloe vera plants are not hard to grow. Many have them as house plants, or if they live in a warm climate they may even grow them outside in their flowerbeds. In Texas and Puerto Rico, for example, they are grown in fields, with the leaves growing about 3 to 4 feet long! These are harvested to make into commercial products for juices and creams.
Can't get yours to grow? Or can't propagate and grow enough for your health needs?
If you give up you can always start buying the products. (I'll be happy to tell you which ones I like best).
An aloe vera plant will sprout little baby plants from it's roots. At least, I've called them babies. I believe the proper name is offsets. Later I discovered that many others refer to these little plants as pups. In any case, propagation from your first plant is quite easy.
When the babies or offsets are about 3 to 4 inches long, just gently pull away these new little plants, trying to keep as much of the white rootlet with it as possible, including any little hair roots, and place it in a depression in another pot of soil. Press the soil close around the root and your baby aloe vera is ready to grow on it's own.
That sounds almost too easy? Then lets discuss propagation in more detail. You can also see my steps in photos.
In doing some research on this, I discover that others have more complicated ways of doing propagation. However since you are here on my site to learn from me, that's really as simple as I keep it.
Some folks talk of laying the new little "offset" or baby aside for a few days so its root dries a callus over it. Well, that won't hurt. I recall once pulling a bunch of these baby plants from the larger pots as I was watering them, just in an effort to tidy them up. I didn't have new pots with soil ready, so I laid them on the table. They were about 3 to 5 inches long, and each had about 3 to 5 nice green leaves. I didn't have the heart to throw them out, and I wasn't sure what to do with them when I had so many pots full (like 69 or 75!) already.

For several weeks I would come into the sun room on Saturday morning to water my plants, - a half hour process - and notice those little babies there, green and just as healthy looking as ever, but their roots out in the air. After a few weeks I was amazed and kept them there just to get a sense of how long they could live unplanted. I forget how long they did last. At some point I had a visitor who showed interest in my aloe vera plants so I offered her that handful of those long-neglected baby aloe veras to start the propagation of her own jungle.
I've developed a strong opinion that aloe vera plants have lots of life in them, have lots of life to give, and are fairly hard to kill by neglect.
Roots
My observation is that aloe vera babies or offsets do best if they have a root. However, sometimes one without a root will put a root down once in some soil and will turn into a good, healthy plant, Usually, I planted them in the same pot as another, just in case. If it takes off and needs a pot of its own, I can always transplant it later.
Generally, aloe vera plants do not put down very long or deep roots. They prefer a wider space, but will take whatever you give them. The bigger the pot the larger the plant will grow upwards. It doesn't need a lot of coaxing. My aloe veras seemed to thrive on my neglect! I often joked that when I didn't water them for a few weeks they would panic that they were dying and would quickly shoot out a few babies to make sure there would be another generation.
Fertilizer? Soils?
Some folks apparently do use fertilizer. About as close as I get is to add a pinch of granules from a container of vegetable/flower fertilizer when I'm preparing the pot for a new aloe vera plant. If my plants look rather pale - going on yellow instead of green - which can happen in spring, when the hours of sunshine lengthen, and I may not be watering enough, I sometimes mix up a pitcher of water with a package of clear gelatin dissolved into it. (I read once in a magazine that this was a tip for when your plants needed more nitrogen to bring up their green colour. Sometimes I remember that).
Because just straight garden soil can get compacted, I like to fill my containers with about half garden dirt, and half peat moss. Then I stir these together for a good mix. I line them up and give each pot or container a good dash of water. Preferably rain water.
Planting Baby Aloe Veras
Once I have a row of containers with dirt and peat moss ready, and the dashes of water doled out, I use a knife or an old kitchen spoon - or even my thumb - to create a hole in the soil mix of each container. Now it's time to pick up the or pull the babies, and gently set each one into its own new root hole. With my fingers I press the soil up firm around the base of the little plant, covering the root part snuggly.
Sometimes I try to prop up a leaning plant with some soil, but I've come to recognize that aloe vera does not like dirt on its leaves. Any outer leaves that rest in the dirt or have little clods of moist dirt on top of them will wilt and go mushy as if poisoned. The longer the rootlet on the plant is, the better for it. But don't worry; ignore the plant for a few weeks, and it will surprise you. It is no wonder some folks think of them as cacti.
Should a plant's reclining posture bother you, you might help it out until its root is firmly established by breaking a ring off a Styrofoam cup and sliding it over the plant, and then positioning it so the plant is propped up better. The angle that the root grows into the soil does seem to affect the uprightness or slouch of the plant for the rest of its life.
[I took photos at my last propagation session, but there are enough to fill a separate page. See them here].
 • All-purpose shampoo for every hair type
• Gentle on scalp
• Natural lather to easily rinse away dirt and oil
• Helps promote soft, manageable hair
 Can't decide? Contact me personally for a FREE sample packet of this shampoo.